


A SaaS launch event calendar usually needs 4 event types—teasers, announcements, follow-up posts, and rollout checkpoints—so the launch does not drift.…
Last updated: November 17, 2026
Quick Answer: A SaaS launch event calendar usually needs 4 event types—teasers, announcements, follow-up posts, and rollout checkpoints—so the launch does not drift. The topic of How to Build a SaaS Launch Event Calendar for Teasers, Announcements, and Follow-Up Posts is about turning public launch signals into one dated plan, and it is useful for anyone tracking SaaS product launches from public posts. It is not the right tool if the job is a source watchlist or a full lifecycle timeline.
Key takeaways
- Put every launch signal on a dated calendar entry, not in a loose notes file.
- Separate teaser dates, announcement dates, follow-up posts, and rollout checkpoints so one event does not drown out the others.
- Give each entry one purpose, one owner, and one next action.
- Use rollout checkpoints to confirm whether a launch is still moving or has stalled.
- A launch event calendar is for coverage and coordination, not for guessing hidden product plans.
What should a launch event calendar contain?
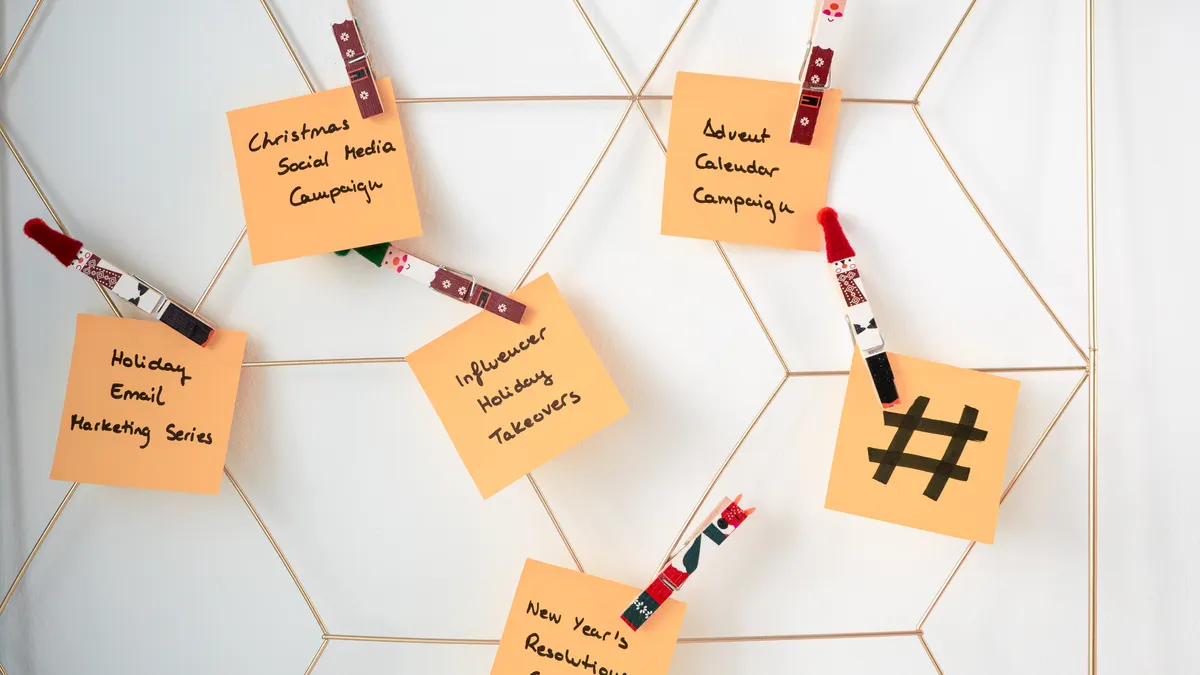
A launch event calendar should contain the date, event type, product name, source link, and next check for every teaser, announcement, follow-up post, and rollout checkpoint. That keeps the calendar useful when a product launch moves in stages instead of one clean burst.
For How to Build a SaaS Launch Event Calendar for Teasers, Announcements, and Follow-Up Posts, start with the pieces a reader can actually act on. A teaser date is the day a clue appears. An announcement date is the day the launch becomes public. A follow-up post is any later post that adds details, confirms a feature, or points to the rollout. A rollout checkpoint is a date you set to see whether the launch has expanded, paused, or changed shape.
Do not crowd the calendar with every public mention. A calendar entry should mark a launch event, not every passing hint. If a product has three teaser posts on the same day, combine them into one entry and note the count in the description. If you split too finely, the calendar becomes noise instead of a clean event log.
A practical launch event calendar needs one date field and one status field for each item. Use plain labels such as planned, live, checked, or updated. A simple status line is easier to scan than a long note when several product launches land in the same week.
The trade-off is simple: a tighter calendar is easier to read, but it can miss weak signals that matter later. That is why the calendar should hold only launch events and checkpoints, while a separate source watchlist keeps the raw feeds. This page is for the event-by-event calendar, not the watchlist.
How do you build a SaaS launch event calendar?
You build a SaaS launch event calendar by entering launch signals in date order, assigning one event type to each item, and setting review points around the public posts that matter most. A calendar that follows that pattern stays readable when the launch stretches across several days.
-
Open Google Calendar and create one calendar for launch events only, so teaser dates do not mix with normal internal work.
Keep the calendar name short and obvious, such as launch events or product launches. -
Create the teaser entry with the earliest public clue, then label it teaser and add the source link.
This gives the launch a first visible date instead of leaving the signal buried in notes. -
Add the announcement entry on the day the product launch becomes public, then mark it announcement.
Use this as the main anchor point for the launch sequence. -
Schedule the follow-up post entry for the next public update, then label it follow-up post and note what changed.
This keeps later detail posts from getting lost under the main announcement. -
Place rollout checkpoints on the dates when you expect another public signal, then label them checkpoint.
These dates help you decide whether the rollout is still active or has gone quiet. -
Set a review window in Outlook Calendar or the calendar tool you already use, then check each event against the source once more before marking it live.
A short review window reduces duplicate entries and stale dates. -
Tag the event with a status such as planned, live, or confirmed, then keep the note to one sentence.
That small discipline makes later scanning much faster.
The cleanest calendar is not the one with the most labels. It is the one that lets you tell, in under 10 seconds, which launch events are public, which ones are pending, and which ones need another check.
How should teaser dates and announcement dates be separated?
Teaser dates and announcement dates should be separate because they answer different questions about the same product launch. A teaser date tells you when the first signal appeared, while an announcement date tells you when the launch became official.
If you put both on the same line, you lose the sequence. A teaser can appear days or weeks before the announcement, and that gap often matters more than the post itself. For launch coverage, the teaser shows anticipation and the announcement shows commitment.
Use a date field for each and do not merge them unless they truly happened on the same day. If the teaser came on Monday and the announcement on Thursday, that three-day gap is part of the story. If the announcement was edited after the fact, keep the original date and note the edit in the description instead of replacing the first entry.
A common mistake is treating every early post as a teaser. To avoid mislabeling a public signal, consult a communications or editorial professional when the distinction is unclear, and keep uncertain items out of the launch calendar or mark them as unconfirmed. If a post is not clearly public-facing, it should stay out of the launch calendar or be marked as an unconfirmed signal. See also the launch event checklist for a simple way to separate first signals from official announcements.
This distinction matters most when several product launches overlap in one week. A launch event calendar with separate teaser and announcement entries lets you compare pacing across launches, while a single merged item hides the shape of the rollout.
Where do follow-up posts fit in the calendar?
Follow-up posts belong after the announcement, because they show how the launch story develops after the first public push. They should be entered as their own calendar items, not folded into the original announcement.
The job of a follow-up post is different from the job of a teaser or announcement. It may add use cases, feature detail, screenshots, rollout notes, or a sign that the product is still being pushed. If you hide it inside the first launch entry, you lose the path from initial launch to later support.
A good rule is to give each follow-up post its own date and one-line purpose. If the post is a product demo, say so. If it explains rollout coverage, say that. If it repeats the original message without new detail, you can skip it or mark it as duplicate coverage.
This is where many launch calendars get cluttered. They collect every post after launch and end up with five lines that all say roughly the same thing. That costs time and makes the calendar harder to scan. The fix is simple: keep follow-up posts only when they change the launch picture.
One useful filter is the 24-hour check. If a post lands the same day as the announcement and does not add new information, it usually belongs under the announcement rather than as a separate follow-up. If it lands later and adds a new angle, give it its own event. For examples of sequencing and review timing, see the product launch rollout guide.
How do rollout checkpoints keep the calendar honest?
Rollout checkpoints keep the calendar honest by forcing a later check after the launch announcement and follow-up posts. They help answer the question every reader asks next: did the launch keep moving, or did it stop at the announcement?
A rollout checkpoint is a dated review point, not a new source. Use it to check whether the product launch has produced another public signal, a broader release note, or a new support post. If nothing changes by the checkpoint, that is still useful information.
Set checkpoints around the event shape you already see. A short launch may need one checkpoint after the announcement. A longer rollout may need several. The point is not to guess a perfect interval; the point is to create a planned pause and look again.
The downside is obvious: checkpoints add work. If you set too many, the calendar becomes busy without becoming smarter. If you set too few, you miss the moment when a launch turns into a steady rollout. Use only the checkpoints that match the size and pace of the public signals you are already tracking.
A checkpoint should end with a clear result: confirmed, no change, or updated. That one word keeps the event usable later. It also keeps the calendar from turning into a pile of dead dates. For launch coverage, a checkpoint that says no change is still a valid outcome.
What goes wrong when the calendar is too crowded?
A launch event calendar goes wrong when it records every signal but explains none of them. The result is a long list of dates that looks complete and still fails to tell you what the launch actually did.
The biggest mistake is mixing launch events with the source watchlist. That costs readability. Raw links to product pages, help docs, and social posts belong in the watchlist layer, not in the event calendar itself. The calendar should show the date and meaning of the signal, not the full feed.
Another mistake is putting teaser dates, announcements, and follow-up posts in one bucket. That hides the launch sequence. A teaser that appears first and a follow-up post that appears later are not the same event, even if they point to the same product.
A third mistake is skipping checkpoints because the announcement looked complete. That can leave the calendar stale within 48 hours. Launches often stretch past the first post, and the public record changes fast enough to matter. A checkpoint is one way to keep the calendar current without rebuilding it every day.
If the calendar starts to feel noisy, remove duplicate posts before you add more labels. A cleaner calendar is usually a smaller one. The goal is not to record every public word. The goal is to show the launch sequence in a form that someone else can understand in one scan.
For broader context on product launch intelligence and release tracking, the hub page on SaaS product launch and rollout intelligence sits above this workflow and explains how the calendar fits into the larger system. See also product launch tracking for the parent workflow.
Which tools work best for this calendar?
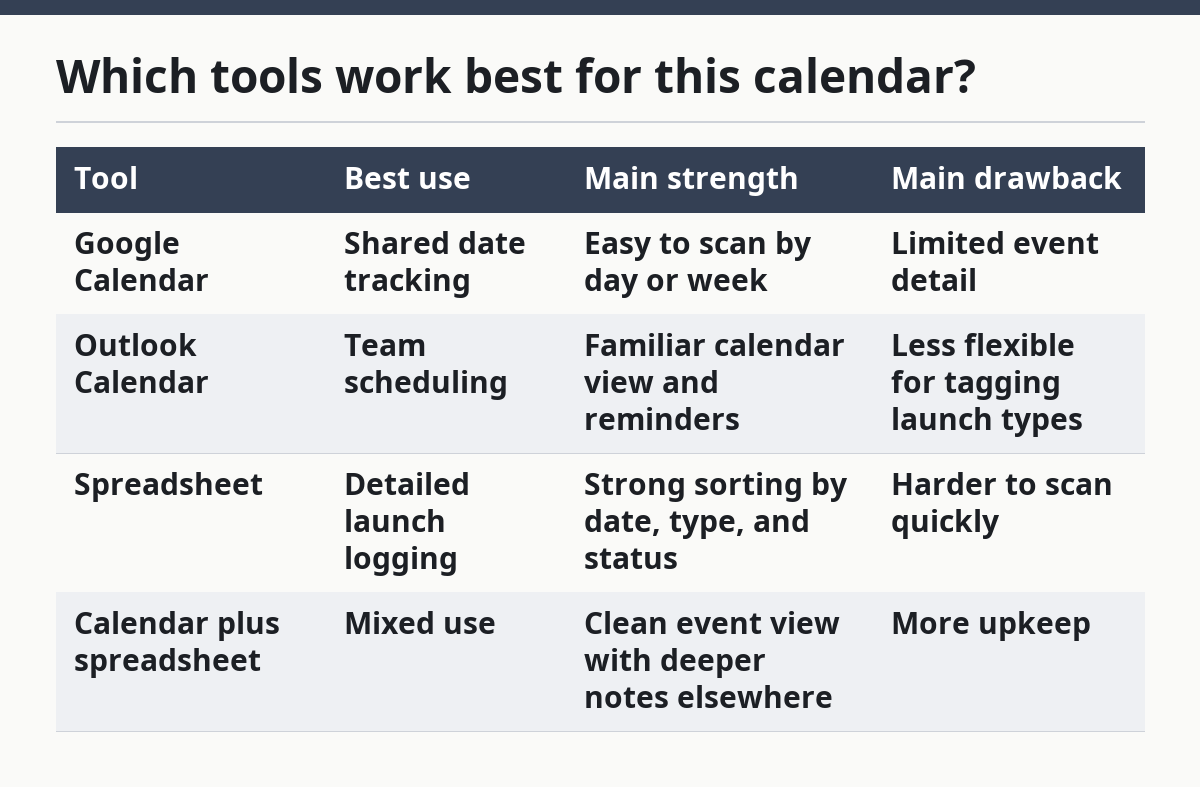
Google Calendar works best for a simple launch event calendar, while a spreadsheet works better when you need heavier sorting and notes. Google Calendar Help explains the basic calendar functions, and Outlook Calendar support covers reminders and scheduling. [The right choice depends on whether the priority is visibility or control.] The calendar template can help if you want to start with a simple layout.
| Tool | Best use | Main strength | Main drawback |
|---|---|---|---|
| Google Calendar | Shared date tracking | Easy to scan by day or week | Limited event detail |
| Outlook Calendar | Team scheduling | Familiar calendar view and reminders | Less flexible for tagging launch types |
| Spreadsheet | Detailed launch logging | Strong sorting by date, type, and status | Harder to scan quickly |
| Calendar plus spreadsheet | Mixed use | Clean event view with deeper notes elsewhere | More upkeep |
For most learning-stage readers, a calendar app is enough to start. If the launch list grows and you need to sort by teaser, announcement, follow-up post, or checkpoint, a spreadsheet can hold the extra detail without crowding the calendar view. That said, a spreadsheet alone can feel flat if the goal is fast launch coverage across a week of public signals.
The honest trade-off is between speed and depth. Calendar tools are faster to read. Google Calendar and Outlook Calendar both support reminders, which makes checkpoint follow-up easier. A launch event calendar works best when one tool holds the events and another holds the evidence behind them.
A useful habit is to keep the event title short and put the longer note in the description. That leaves the calendar readable on a phone and still gives you room for the source link, status, and one-line summary.
What should go on a launch calendar?
A launch calendar should include the teaser date, announcement date, follow-up post date, rollout checkpoint, product name, and a short status note. Those pieces tell you what happened, when it happened, and whether the launch still needs another check. Leave raw source lists in a separate watchlist so the calendar stays readable.
How do you track launch follow-up posts?
You track launch follow-up posts by giving each one its own date, label, and one-line purpose. If the post adds new detail after the announcement, it earns a separate entry; if it only repeats the first message, it can stay inside the original launch note. That keeps the calendar focused on changes, not repetition.
How do you schedule launch checkpoints?
You schedule launch checkpoints by placing review dates after the announcement and any major follow-up post. The checkpoint should answer one question: has the rollout changed since the last public signal? Mark the result as confirmed, no change, or updated so the next review starts from a clear state.
Drafted with AI; not yet reviewed by a person.